Most of my work is inspired by fashion, or at least design outside the culinary world. Yet people always ask me to make a cake that looks like their purse. Why do you want to eat your purse! This blog can be a learning tool for you and an outlet of self expression for me:) No more purse cakes! Enjoy!

Saturday, March 2, 2013

Mustache Party!!!!


I know what you are thinking.....What does this have to do with fashion?  Well here's the thing.  Mostly, this blog will be things I create based on a certain fashion inspiration.  But, sometimes I get to do a project that I love and just have to share.  So this post is mainly inspired by pop culture! 

A couple weeks ago my friend Candace asked if I would make her son's first birthday cake.  His name is Major!...best name ever!  Of course I said yes; especially because she wanted to create a "Little Man" birthday party with a mustache theme.  Done!  I have always wanted to make a mustache cake.  Weird.  I know!  But true.

So let's look at some pop culture references shall we.  See, lots of celebrities grow mustaches.  It seems to be a fashion trend from time to time. 

Here is James Franco with a mustache....

And Zac Efron....


Newly Oscar'd Ben Affleck...sporting both mustache and beard...thank you Ben.
Classic mustache by Tom Selleck...


Oh and here is Sandra Bullock pretending to have one....


And last but not least....
Phylicia Rashad???


Wasn't it Clair Huxtable who said you can't eat cake for breakfast??  I disagree!

Okay let's get to it! So this first thing we need to do is cover the cakes in fondant and texture the edges.  I am going for a vintage look.....

So I use my gumpaste tool to mark the edges.  Stay with me.....


I bought this Black Onyx cocoa powder in Austin when I was out there judging the Austin Cake Show (www.thattakesthecake.org) and I want to use it to "age" this cake.   I made the marks with the gumpaste tool for added drama.


So I am just using a dry paintbrush to work the cocoa into the fondant and rough it up a bit....


I know....it looks ruined.  But it's not!!!  Stay with me....


I thin a little cocoa with vodka and splatter the whole cake....this is super fun, by the way.  I think
I want to be Jackson Pollock when I grow up!!

Now for the staches!!!  I am going to cut most of them out by hand but you can use a cutter.  There are many on the market.


This one I traced first with a gumpaste tool and then cut out using an Xacto knife....


Here is another one.  I use the same tool to add texture.  Oh I am doing a whole blue and brown thing.....forgot to mention that.


It's coming together!!!


Looking good.  I am gonna add some frames as well but I want to get started on the other treats.

First....the smash cake.  So, many times when a child turns one, a smash cake is provided for he or she to rip into...because it's a.)funny and b.) probably their first taste of sugar.  This one is going to be a mustache of course:))

I baked a 6 inch round and used a circle cutter to score it....


Then I cut it into a wave shape by following the lines.....this way it is even....


Then I flip one over and sculpt them....


Now they are ready for a crumb coat....


Now I will chill the cakes and then pipe the mustache with a medium star tip...


It doesn't have to be perfect, just follow the lines and have fun!!  Here it is.


So cute!  If I could grow a mustache made of chocolate, I would never shave!!!  But then again, people would be constantly trying to eat my face.  Okay never mind;)

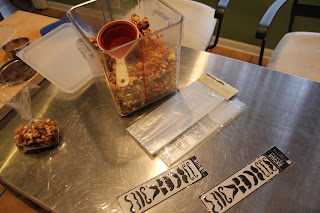
Here's another fun treat.  I love to make caramel corn.  So I have decided that bags of this sweet popcorn will be favors for peeps to take home.  But we have to "stache" it up a little!


I got these mustache stickers from the craft store and will use them to decorate the bags before I fill them....


Die!  Too cute!

Okay let's finish the cake.  I added a couple frames with this purple fondant.  It can be any color because I am going to paint them with black food coloring for a shiny look.  Purple is just what I had to get rid of!


So here you can see the purple and the black.  The frames were just cut and molded by hand.


Here he is!!!


And here are some shots from the party!


Mustache cupcakes!!!

So a big thank you to my friend Candace for letting me go wild!  And a super HAPPY BIRTHDAY to Major!!!


Sunday, January 6, 2013

A cake fit for McQueen


I couldn't be more excited about this post!  I get much of my inspiration from fashion...duh...but most comes from the house of Alexander McQueen.  I have a bit of an obsession.  Although he is no longer with us, Sarah Burton continues to "wow" the world with her work overseeing the creative direction for the line.  You might recognize her name from the world famous royal wedding.....she made the dress...

Perfection!  She was also named International Designer of the Year in 2012 by Elle UK.  And so his name lives on as well as the over the top looks and impeccable British tailoring......and as for the runway shows...well you can see for yourself.  This is my favorite!!

Here is a short from his biography.....

Alexander McQueen shows are known for their emotional power and raw energy, as well as the romantic but determinedly contemporary nature of the collections. Integral to the McQueen culture is the juxtaposition between contrasting elements: fragility and strength, tradition and modernity, fluidity and severity. An openly emotional and even passionate viewpoint is realised with a profound respect and influence for the arts and crafts tradition. Alexander's collections combine an in-depth working knowledge of bespoke British tailoring, the fine workmanship of the French Haute Couture atelier and the impeccable finish of Italian manufacturing.
Yep that pretty much sums it up. 
The men's line is always amazing as well.  I went to NYC in August....just to play....I'm always going for cake stuff;)  This time though, it was just to hang out.  While there, my friend Pete surprised me with an early Christmas present.....


These babies:)))))  Pete, you are the best!!
I was gonna get these but my face is too small;)

I mean look at that coat!  That could be a cake.....see what I mean!
Okay lets talk about inspiration.  I love the texture of the woven dress here.  So that is where I  want to start.
Also, I couldn't choose just one single look for inspiration.  So I'm using a few and making a cake as my ode to McQueen!
I know I have used the diamond impression mat before but this time I am gonna put a spin on it and try to make the illusion of "woven fabric".

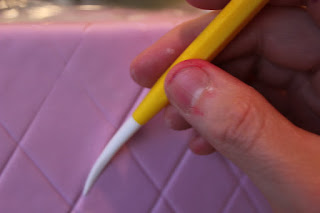
So to start, I cover the cake in this pink fondant and make my impression.  Then deepen the lines with a gumpaste tool. 
Next, I start roughing it up.....but only every other diamond.


So here is part one....finished.  Looks a little cray cray at the moment.....
Now I am taking a different color (this wine color) and rolling it out.

And then I use the same impression mat on this to get my lines.

Now I cut the diamonds apart.
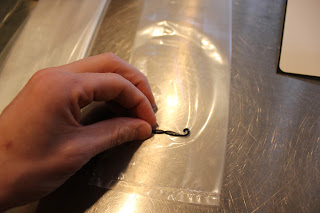
I am going to place them one at a time.  So I keep the others in a plastic bag so they will not dry out.
I paint the back with a little piping gel.

And place it in the untextured diamond space.

Now I texture each one the opposite direction as the diamonds in light pink.

Here is the end result....

Fancy!  Okay let's move on
Here is the next look that I am in love with.  Even in this still shot, you can see the movement of the fabric.  This is why I love fashion shows so much.  This is not a ready to wear look....but it's exciting and makes you want to see more!

I think she stole my sunglasses;)
So for the next cake, I have to create this movement.  Since it's the middle tier, I also want to have a middle piece that draws the eye in.  Oh yeah, it's gonna be a skull.....signature McQueen.  So I made this little skull.  I couldn't really shoot the process....but I just started with a ball and worked it with my fingers and gumpaste tools.....


I am using the pink one.  The grey number was for practice.


For the ruffles, I start by rolling a strip of fondant.  I used fondant because gumpaste would dry too quickly and we need to thin this and work it for a while.


Now I take the small side of the ball tool and thin by pulling out.  But I still leave a thick side to secure it and to make the ruffles seem a little spread apart.

Now flip and ruffle over and do the same technique with the larger side of the ball tool.....so we don't tear what we already made.

Now I wind it around an object that the skull will fit into and let it dry before gluing to the cake with piping gel.  This will start the foundation for the ruffles.

So you can see I just keep going and changing colors slightly...not really for an ombre thing, but to show variety....

I also added some pearls for the skull's background. And painted them with pearl dust.


Looking good!  If you want to learn more about making ruffles for cake, you should try Maggie Austin's class on Craftsy.com (shameless plug:)


Okay.  Now for the last tier!  McQueen has a line of clutches that are amazing.  This one is the Britannia clutch.  I like it because of the flag design.  So I decided that for the top tier I would make my own.  But not an actual purse (lol).


Here is the tier.  I'm not going into detail here because this post is getting long!!  I will show these techniques in a future post, however.


This is the texture underneath.


I used butterflies because of this look....


It's like a butterfly family reunion on her face;) and I love it!


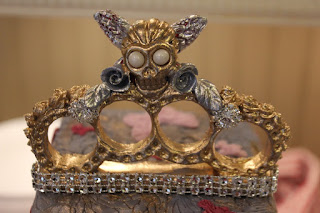
Now for the finishing touches.  I made a little skull and some brass knuckles!


This is the first time I have ever made brass knuckles out of sugar.  Not a surprise.


Here is the middle skull all gussied up!


And here she is all complete!!  Drum roll.....


That's all for now.  Thanks to Pete again for the sunglasses and to Sarah Barton and the McQueen house for inspiring me everyday.  Oh and this won't be the last McQueen post:)

If you want to learn more, you can take my class on Craftsy.....click the link below!