
Can we just talk about this photo for a minute? Perfection! This is one of the many reasons I love the work of this man. Valentino Garavani.....or as we know him...just Valentino. He became known in his early design years for this bright and rich color red. The color now has it's own name....Valentino Red.
Here are a couple of my faves...

This already looks like a cake! I love the piping.....surprise, surprise!
I love this look too....

And THIS is everything....

Here is the latest fashion show. There is a ton of cake inspiration here with the color blocking, large scale patterns and clean lines....
This is the look that became my inspiration....

I am a sucker for a photo that looks like it is in motion. I love the movement in the garment!
It's a dramatic statement in a simple way. So I will definitely be using the red color, the ruffles, and maybe add a touch of gold.....I am putting gold on everything at the moment!...even my desserts...

Yes...that's a golden blackberry! I'm obsessed.
Since the fabric of this piece is not a pattern, I need to create some sort of texture to break it up a bit. This brings me back to A Cake Fit for McQueen.....

Remember this texture from the top tier of the cake? I never showed the technique and now is the perfect time.
I will start by covering both of my cake tiers in red fondant. I was going to mix my own red but Fondarific has a great red with the same bright color as Valentino....
PIUG(BBSc8!DkRGw~~60_3.JPG)
Also, because we are doing a texture treatment on one of the tiers, we need a fondant that will not dry out so fast. So this will work great.

We are going to work on the bottom tier right away because it has the texture treatment. Using a patchwork cutter, I will emboss the cake in a...well..."organic" way;)
This is the cutter....it's the Large Daisy Patchwork Cutter.


Push the cutter into the cake just until the lip touches the surface. Then pull away.....


Then continue along. Keep in mind, this is not a "perfect" application.....it should look wild and spontaneous! As you can see in the photo above, I have a fondant smoother to hold the tier in place while I use the cutter. This will allow you to push in without the cake sliding, or getting any hand prints on top.
Okay now for the gold. So usually I mix my gold really thick like paint so I can guild my piece and get an amazing shine. This, though, will be a color washing....so I mix it every thin...


So the idea is that, you run the brush over the cake and the gold mostly gets trapped in the nooks of the cutter marks....looks like fancy wrapping paper;)
Now I put the tiers together and add some ruffles to the top tier....

We need to make the ruffle "pop" though. I am going to mix some thicker gold to detail the ruffles....


YES! A couple extra touches and we are done! I added some piping and a butterfly to round it out.
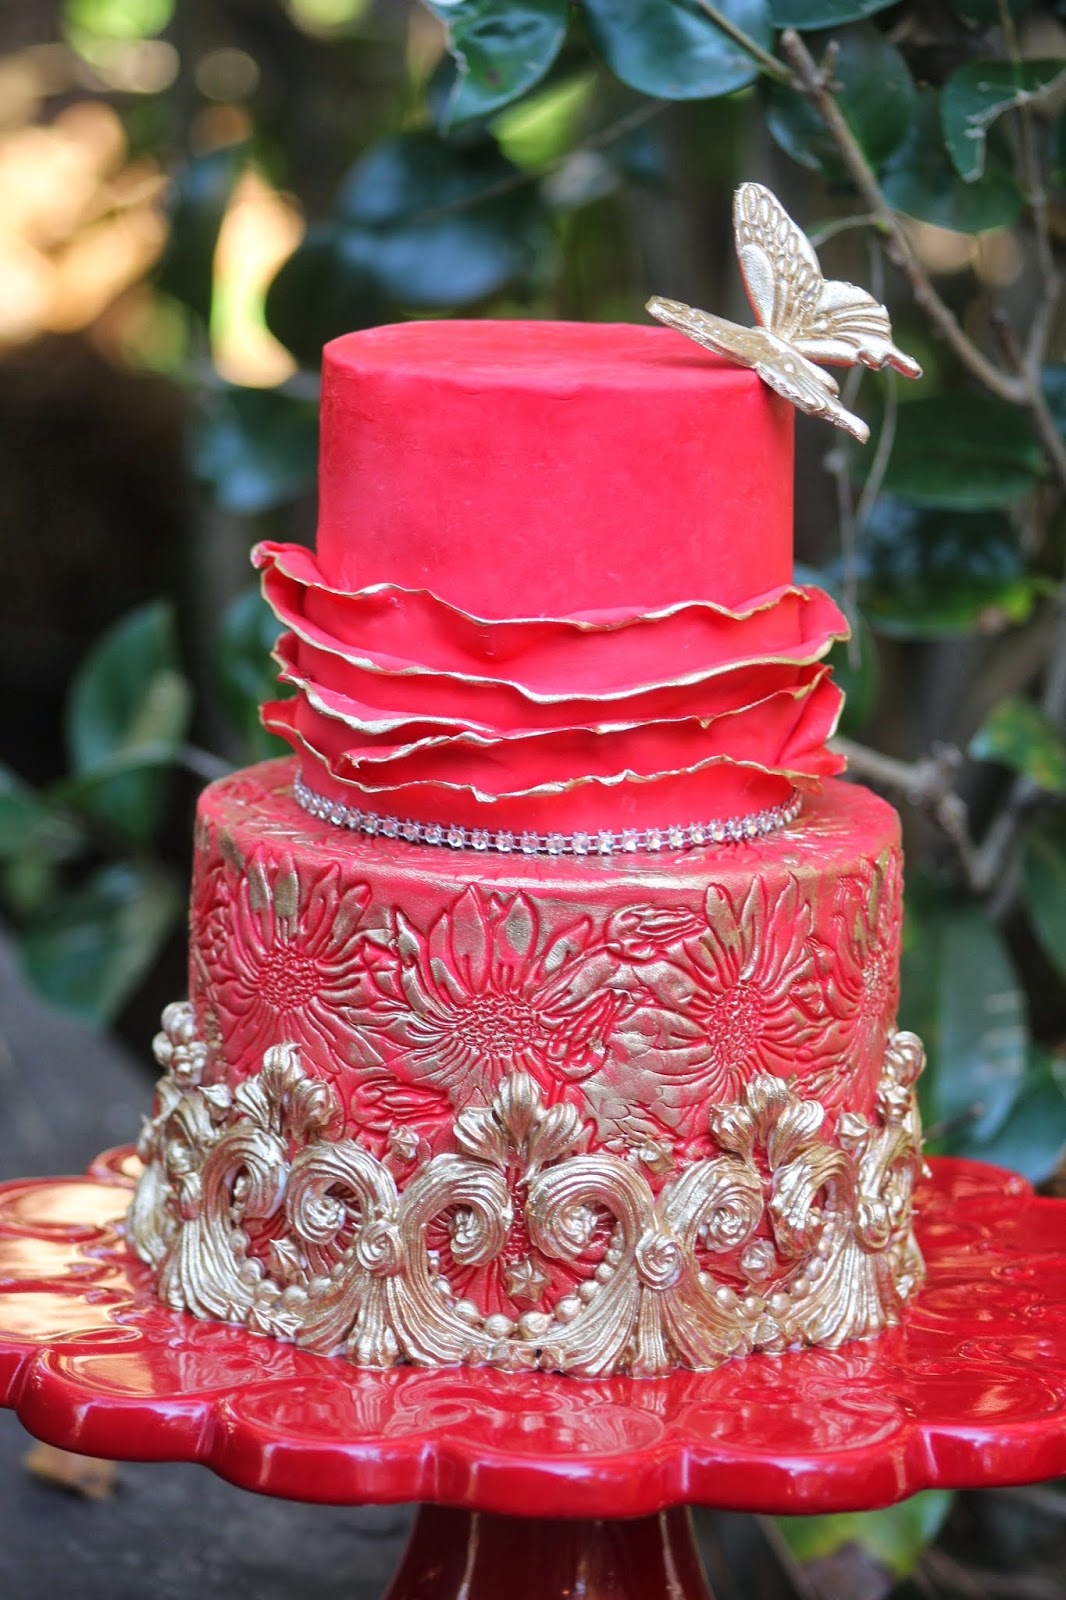
She's finished!!
Now a couple of announcements....
- If you want the latest updates and posts, subscribe by adding your email in top right corner of this page.
- Also, you can follow me on Facebook or Instagram or Flickr. And for more dessert inspiration, you can follow my new company in2food on Instagram.
- I have a tool line coming out this year that I am super excited about. I will post links when they arrive through Country Kitchen Sweet Art.
- If you want discounted classes on Craftsy, you can use the "Craftsy Classes" button at the top of the page. I will update that list as classes are released!
Lastly, I will be teaching in Canada in September with Karen Portaleo....

These are the cakes. Click on the picture for more information. It's gonna be fun!!
Bye!


Thanks for sharing once again!! :D Love that technique!!
ReplyDeletelove it.....and all what you do Joshua. God Bless your talent.
ReplyDeletenice info... like your design....
ReplyDelete