.jpg)
So a couple of months ago, I was asked to a part of Cake Central's Fashion Issue. WoHooooo! I was so excited. The idea was that the girls from CC would pick runway looks to inspire a cake. The cake did not need to represent the look exactly.....just used for interpretation....you know to get the "creative wheels" turning.
Although my fingers were crossed for an Alexander McQueen number, I received this look from Stella McCartney.....
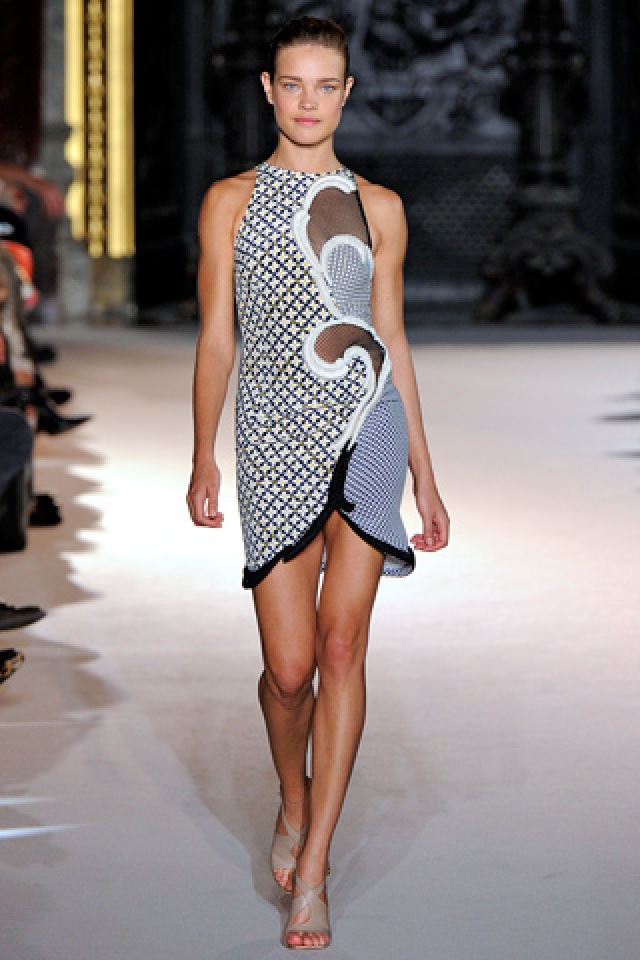
It's pretty bangin'. The dress is super modern and young. Here is the look on the beautiful Brooklyn Decker.....

Okay, I love it. But I (of course) decided to run with it and put my own spin on the look. Everyone in fashion is looking for the next thing....something fashion forward. Well, guess what, I am going fashion backward!
I am super into texture on fondant cakes. Flat fondant cakes can be so lame. So I started to think...."where could this look have come from".......maybe I can take it back to centuries ago...(in my imaginary world) and create a look that inspired this one. A look fit for a queen!
I immediately gravitate toward the blues and yellows and the diamond pattern.
I've decided to use the diamond impression mat and go a little further with the detail.
I cover the cakes in fondant one at a time (so they don't set while working on the others) and detail them before the fondant has time to dry. And yes I am using dummy cakes.....I have to...it's for a photo shoot!!
.jpg)
After I cover the tier, I quickly use the impression mat and fondant smoother to get my guide. I like using the mats.....but only faintly....so I can go back and detail them.


Now I deepen the lines with my metal scraper (PME).
And then make a second line beside each one.....

Then I take my gum paste star tool and make an impression in each intersection of the design....

And now for the magic! I know it's hard to see the real detail....but keep in mind that we are going to color this print....then the design will pop.

Using the gum paste tool, I add "stress" marks to make the fondant more fabric like.....

Once all the cakes are detailed, I stack them.

The paper piece you see is a template for where I want my ruffles to go. If this were a real cake, i would mark the template and start adding the ruffles. But since it's a dummy, I will cut this fondant away.....

Okay now we are ready to add the ruffles.
Using gum paste and a cell pin, I roll long strips and thin one edge to achieve the ruffled look....

Then I roll the strips into different shapes using a little piping gel on the thickest side....

So I have to continue this throughout the entire negative space.....Yes...it took a long time. But the result is well worth the work!.....
.jpg)
Here it is half way done. The brooch is also hand shaped. They are easy to make using a set of oval cutters and a gum paste tool. This is also something I teach in my Craftsy class Modern Piping. www.craftsy.com/modernpiping :)))
.jpg)
.jpg)
Now all the ruffles are done!! This could be the finished piece!....but I want to add color. I started with white because....well I hadn't decided on color yet.
.jpg)
So normally I would roll out a piece of fondant and add texture and then use this piece to test out my colors. But since I am taking the photos myself, I am using the back side of the cake! Ghetto?...no...I call it resourceful;)
I am not digging the blue so we are gonna go with yellow for the cake with blue accents.....
.jpg)
Now I mix up the color I like a little darker than I want. It a technique I call "color washing". It's hard to capture with a camera but I can explain!
I take a small paintbrush (only covering a small area at a time, not to let the color dry) and I paint the yellow into the texture (the cracks) of my design.
Then with a damp craft sponge, I rub the color around and take most of it off. This way, the color stays in the texture but only stains the outside flat fondant....
+(2).jpg)
Here is what it looks like up close! It gives a vintage feel.
.jpg)
Here she is!!! I'm loving the color. Now for more detail! We need something inside the diamonds to relate to the original pattern on the dress.....
.jpg)
Here is a lace mold I make with Silicone Plastique....it's a product from www.makeyourownmolds.com . It's a great tool to make custom molds. So I place small pieces of blue fondant into the mold, unmold them, stretch slightly to make them more oval in shape, and adhere them to the spaces with a little piping gel.
.jpg)


.jpg)
Now for the cross sections, I place these 4MM pre-made sugar pearls and paint them gold....
.jpg)
.jpg)
Almost done!!! All we need is some depth. I mix a little pearl dust with blue gel color and vodka to paint the alternating diamond pieces and the centers of the brooches....


and the gold....
.jpg)
And now for the grand reveal!!! Drum roll please.....
.jpg)
Yay!!!
.jpg)
Here she is a little more food styled!!
.jpg)
.jpg)
That's all for now. Thanks to cake central (http://cakecentralmagazine.com/ ) and Stella McCartney (www.stellamccartney.com) for your beautiful inspiration!!!
.jpg)