Most of my work is inspired by fashion, or at least design outside the culinary world. Yet people always ask me to make a cake that looks like their purse. Why do you want to eat your purse! This blog can be a learning tool for you and an outlet of self expression for me:) No more purse cakes! Enjoy!

Friday, December 28, 2012

Kim Z's cake replica


So last year I went to China with Karen Portaleo of Highland Bakery because she was asked to do cakes for a Halloween display at a mall in the Diamond Hill District of Hong Kong.   While we were there, Kim Zolciak of the Real Housewives of Atlanta tweeted that she needed a cake for her wedding.  The Bert Show on Q100 saw the tweet and just so happens that we had done the wedding cake for Jenn Hobby who was a co-host of that show at the time.  Here is her cake....


Vintage Christmas.....so fun.

Anyhow....you see where I am going with this.  Kim decided to use us as her cake peeps.  Of course the whole thing was filmed and the wedding was crazy.....like Colin Cowie crazy...and by that I mean he actually planned the event!  Talk about being star struck Kim, Kroy, and Colin. Cray cray!

Little did we know when we got off the 15 hour plane ride back that Kim's wedding was in 11 days! Yikes!  So on top of all the other orders we had, and the jet lag, we had to create an 11 tiered master piece. 

Just a side note here.....You always hear about how demanding and awful celebrities can be, not Kim.  She couldn't have been cooler!  From the tasting up until the day of the wedding, she was easy going and put all of her trust in us.  Here is the direction she wanted to go with design.....


BUT....she told us to be creative and let our artistry shine so here is the finished cake....


Whooo hoo.  And here is the best part.....it was in Life and Style Magazine!!!!


A year later, naturally she asked if I would make a small replica of the wedding cake for the 1 year anniversary.  I jumped at the chance!  And although it's not technically inspired by fashion, it IS pop culture....so I decided to make a tutorial and blog post.
 
When I first met with her, she insisted that the one year old anniversary tier be used in the cake.  Kim is very superstitious.  I was reluctant because I wasn't sure what condition the cake would be in.  But I was very surprised, when I picked it up, to find this....


Wow. It looked the same as the day I made it.  I pretty sure that foil and little help for Baby Jesus had something to do with it:)  Now I had to try and remove the flowers so I could re-ice the cake....


Again...perfect!  So now I scraped the cake to re-ice it.....
 
 
Mmmm....carrot!
 
While the cakes were baking I started the flowers.  On the original cake, Kim wanted crystals.  Now I have never been to keen on using them but they had to be in the design.  At this point I don't feel like it's that big of a deal,  as long as you know the caterer who is cutting the cake and trust that they will remove the crystals before cutting.
 
Here are the crystals I got from Etsy and some fondant that I kneaded a little Tylose into.  You could use gumpaste, but I wanted them to stay a little soft so they are easy to remove.
 
First I cut circles....

 
Then brush the circle with piping gel all over....

 
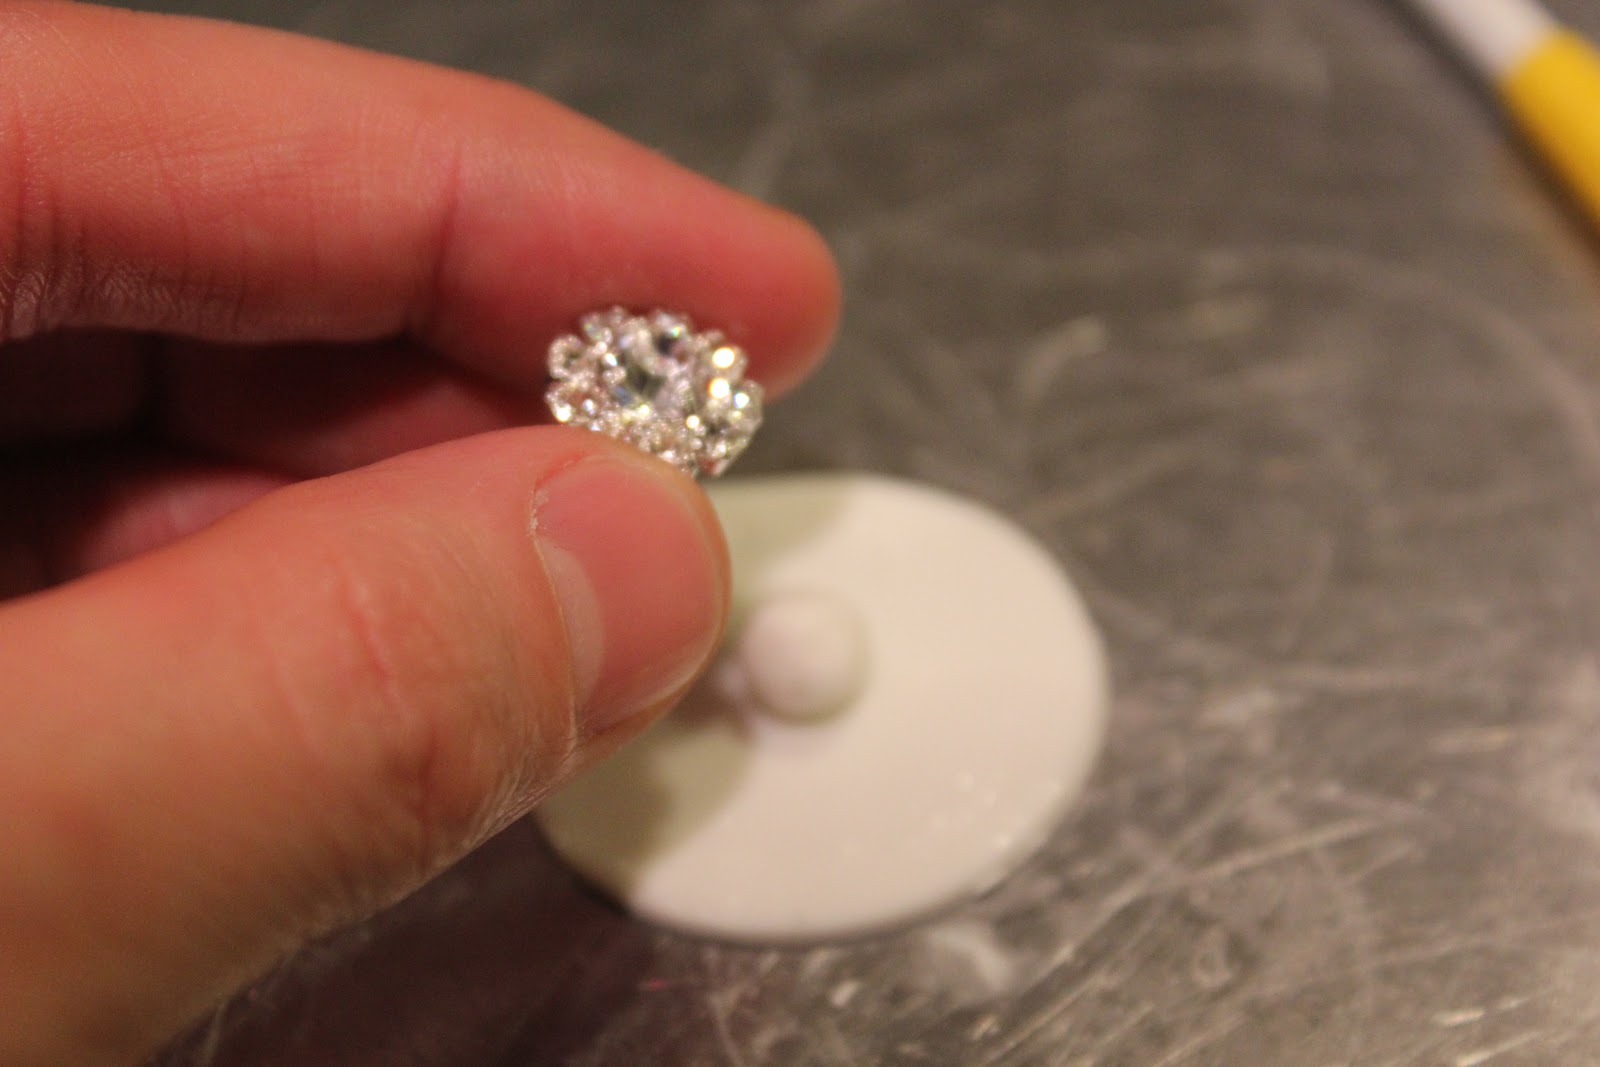
Next add a small hand rolled ball to the middle....this is the anchor for the crystal....


Then push the crystal into the ball so it won't move around...


For the flower part, I used a pasta machine taking the paste to #2 setting.  I know that seems thick but these are not real sugar flowers, so the thickness is needed to show the detail....

 
Start close to the crystal with one end and wind around....


Done!  Here is all of them....


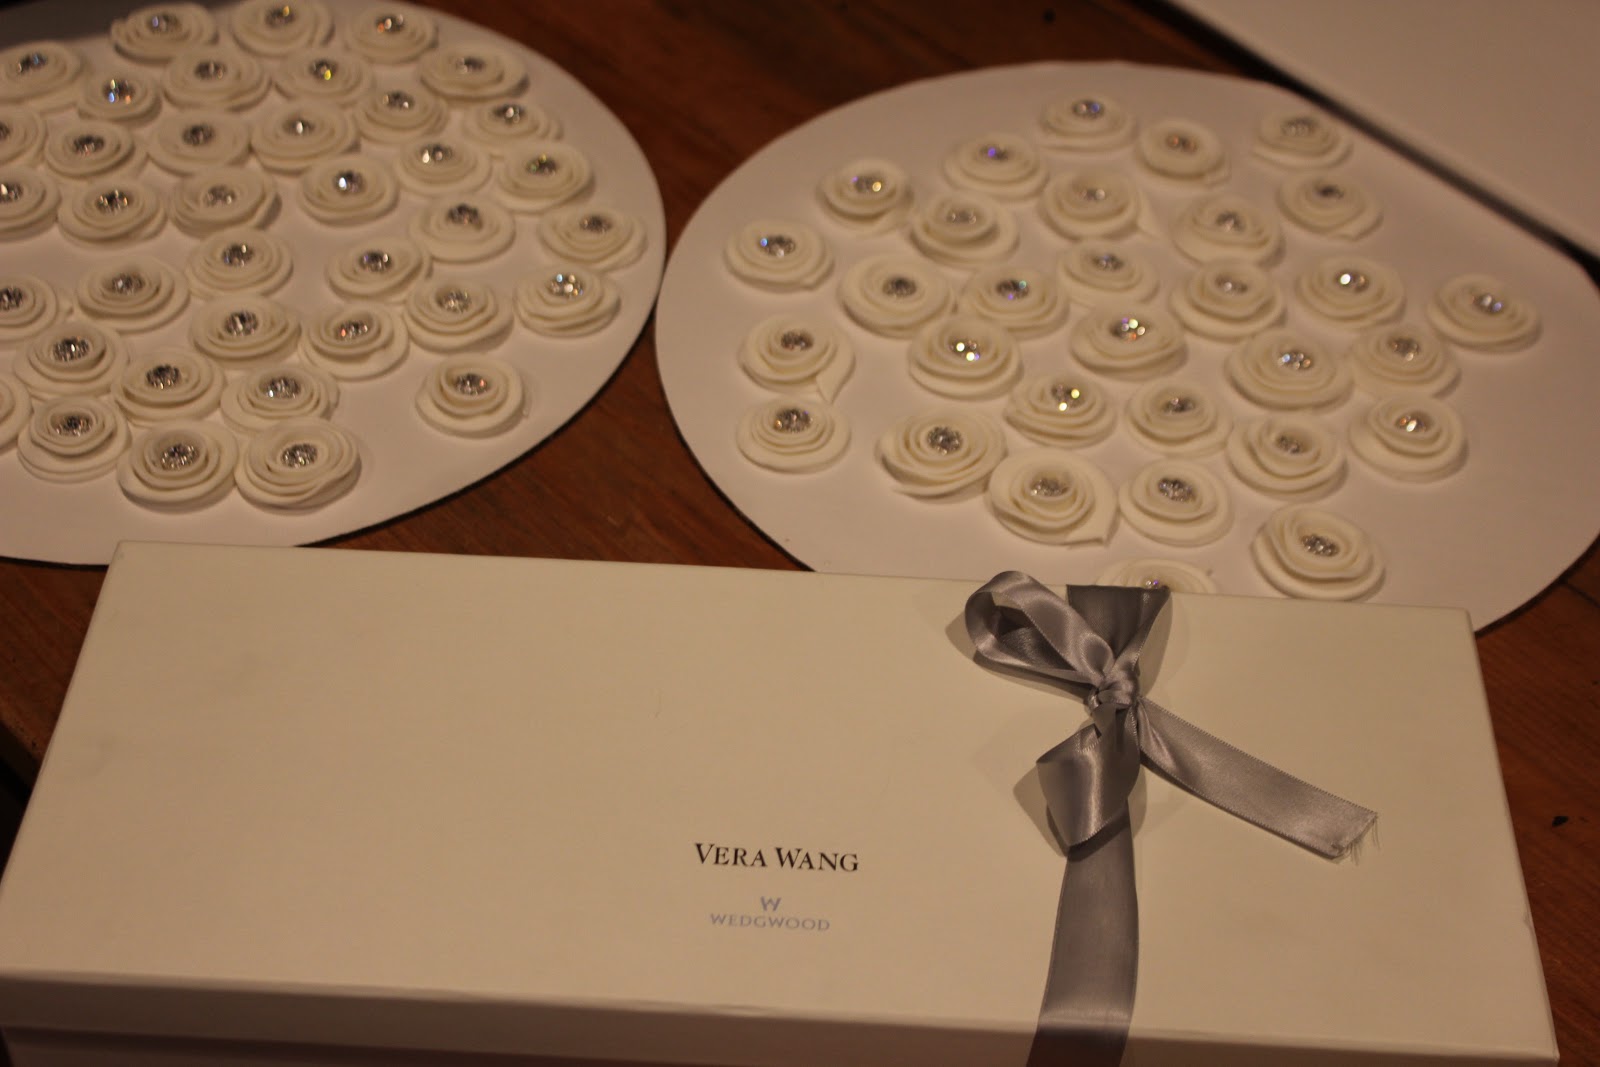
The Vera Wang box was a set of cake cutters.  Kim was in the process of moving and couldn't find the originals.  And because they were Vera, that totally qualifies this as a "fashion cake"....see everything worked out;)
 
Okay lets cover some cakes!!
 
 
Once all the cakes are crumb coated, start rolling the fondant.

 
I like to use a French rolling pin.  But you can use whatever feels comfortable to you.

 
Once you have rolled the paste to the thickness you need, carefully roll it onto the pin.

 
Put the cake in place and unroll the fondant over the cake.


Now smooth using a fondant smoother.


Now to start stacking!  I like to use bubble tea straws for support.  There are many structural items out there including wooden dowels, but I like these best.  You can find them at most Asian markets or online. 

 
Then take scissors and trim the excess.


Now, I use a little royal icing to secure the layers to one another.

 
Place the next tier on top.

 
Now I start adding the flowers.  I am only stacking a couple at a time.  For one, I don't like to drive with completed cake.  The roads are too bad.  So I always allow myself some time for set up when I get to the venue.  I am using a piping bag and a little royal to adhere each flower.


The next tier up gets a crystal band.  This you can find at Caljava.  It's a great product because you can cut it to the size you need!

 
Brush the back with piping gel and adhere to the cake.

 
Yay!

 
The rest of the tiers repeat this design except for the diamond pattern....but I already went over that in the Stella McCartney post.


I stacked the cake before leaving just to make sure it's level. And then take it apart for travel.

 
All ready to go!!
 
Here is the finished product!


:))))))
 
That's all for now!  Thanks to Kim Z. for letting me blab about her cake.  And I can't really talk about it.....but you might see this cake and others on TV next year!  Stay tuned!


Wednesday, November 7, 2012

Stella McCartney:))


So a couple of months ago, I was asked to a part of Cake Central's Fashion Issue.  WoHooooo!  I was so excited.  The idea was that the girls from CC would pick runway looks to inspire a cake.  The cake did not need to represent the look exactly.....just used for interpretation....you know to get the "creative wheels" turning.

Although my fingers were crossed for an Alexander McQueen number, I received this look from Stella McCartney.....


It's pretty bangin'.  The dress is super modern and young.  Here is the look on the beautiful Brooklyn Decker.....


Okay, I love it.  But I (of course) decided to run with it and put my own spin on the look.  Everyone in fashion is looking for the next thing....something fashion forward.  Well, guess what, I am going fashion backward! 

I am super into texture on fondant cakes.  Flat fondant cakes can be so lame.  So I started to think...."where could this look have come from".......maybe I can take it back to centuries ago...(in my imaginary world) and create a look that inspired this one.  A look fit for a queen!

I immediately gravitate toward the blues and yellows and the diamond pattern.

I've decided to use the diamond impression mat and go a little further with the detail.
I cover the cakes in fondant one at a time (so they don't set while working on the others) and detail them before the fondant has time to dry.  And yes I am using dummy cakes.....I have to...it's for a photo shoot!!


After I cover the tier, I quickly use the impression mat and fondant smoother to get my guide.  I like using the mats.....but only faintly....so I can go back and detail them.


Now I deepen the lines with my metal scraper (PME).

And then make a second line beside each one.....


Then I take my gum paste star tool and make an impression in each intersection of the design....


And now for the magic!  I know it's hard to see the real detail....but keep in mind that we are going to color this print....then the design will pop.


Using the gum paste tool, I add "stress" marks to make the fondant more fabric like.....


Once all the cakes are detailed, I stack them.  


The paper piece you see is a template for where I want my ruffles to go.  If this were a real cake, i would mark the template and start adding the ruffles.  But since it's a dummy, I will cut this fondant away.....


Okay now we are ready to add the ruffles.


Using gum paste and a cell pin, I roll long strips and thin one edge to achieve the ruffled look....


Then I roll the strips into different shapes using a little piping gel on the thickest side....


So I have to continue this throughout the entire negative space.....Yes...it took a long time. But the result is well worth the work!.....


Here it is half way done.  The brooch is also hand shaped. They are easy to make using a set of oval cutters and a gum paste tool.  This is also something I teach in my Craftsy class Modern Piping. www.craftsy.com/modernpiping  :)))


Now all the ruffles are done!!  This could be the finished piece!....but I want to add color.  I started with white because....well I hadn't decided on color yet.


So normally I would roll out a piece of fondant and add texture and then use this piece to test out my colors.  But since I am taking the photos myself, I am using the back side of the cake!  Ghetto?...no...I call it resourceful;) 

I am not digging the blue so we are gonna go with yellow for the cake with blue accents.....


Now I mix up the color I like a little darker than I want.  It a technique I call "color washing".  It's hard to capture with a camera but I can explain!

I take a small paintbrush (only covering a small area at a time, not to let the color dry) and I paint the yellow into the texture (the cracks) of my design.

Then with a damp craft sponge, I rub the color around and take most of it off.  This way, the color stays in the texture but only stains the outside flat fondant....


Here is what it looks like up close!  It gives a vintage feel.


Here she is!!!  I'm loving the color.  Now for more detail! We need something inside the diamonds to relate to the original pattern on the dress.....


Here is a lace mold I make with Silicone Plastique....it's a product from www.makeyourownmolds.com . It's a great tool to make custom molds.   So I place small pieces of blue fondant into the mold, unmold them, stretch slightly to make them more oval in shape, and adhere them to the spaces with a little piping gel.


Now for the cross sections, I place these 4MM pre-made sugar pearls and paint them gold....


Almost done!!!  All we need is some depth.  I mix a little pearl dust with blue gel color and vodka to paint the alternating diamond pieces and the centers of the brooches....


and the gold....


And now for the grand reveal!!! Drum roll please.....


Yay!!!


Here she is a little more food styled!!


That's all for now.  Thanks to cake central (http://cakecentralmagazine.com/ ) and Stella McCartney (www.stellamccartney.com) for your beautiful inspiration!!!